
Q1. How do I install the theme onto my wordpress blog?
Upload via Dashboard
- Download theme (premium-style.zip) from download location.
- Log in to your WordPress Administration Panel.
- Select the Appearance panel, then Themes.
- Select Install Themes.
- Click the Upload button to upload the file that you have previously downloaded to your machine.
- Activate the theme.
[GOPIPLUS-ADS=AD1]
Upload via FTP
- Download theme (premium-style.zip) from download location.
- Unzip the premium-style.zip file, you may see all theme files are located in the the-professional folder.
- Using an FTP client to access your host web server.
- Upload the premium-style folder to the /wp-content/themes/ directory on your host server.
- Go to the themes page, from the available themes section, activate the theme.
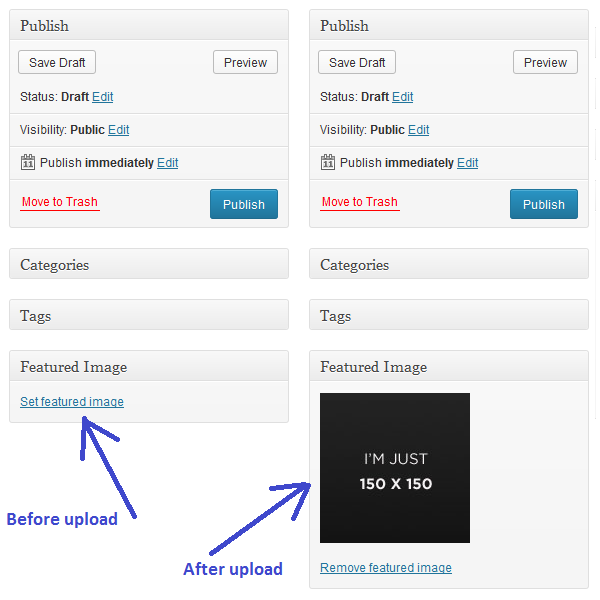
Q2. How to setup Featured image for post?
You can see the Featured Image module in the bottom right corner of your Add New or Edit Post page. Click Set featured image link to upload your images. also you can select the existing images for the posts. Once the image has successfully been uploaded, you will see that image displayed as thumbnails. This image will be display in the home page post thumbnail.
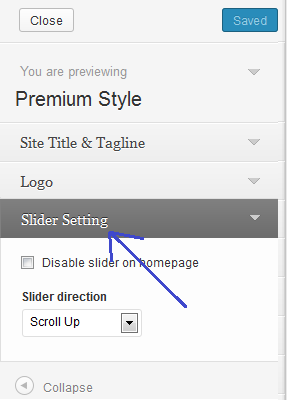
Q3. How to Disable and Enable home page slider?
In the home page we have Cycle Jquery Slider to display our sticky posts. In default this theme will scroll the sticky post in the Home page. To Enable or Disable this slider please navigate to customize menu in the Appearance menu, and update the setting.
Go to Administration Panel ==> Appearance menu ==> Customize ==> Home Slider Setting
[GOPIPLUS-ADS=AD2]
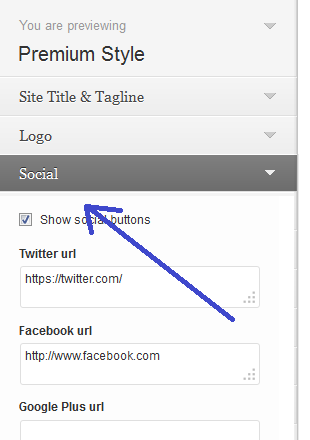
Q4. How to configure Social Icon in the theme?
In the customize menu we have separate section to configure Social Icon. To hide the particular social icon make the respective social URL field empty. so that the particular icon hide from the display.
Q5. How to add favicon in the theme?
Themes are completely overwritten on update, any such user configurations will be lost. We recommend configure Child theme to do this setting.
- Go to your WordPress Administration Panel.
- Click on Appearance menu.
- Click on Theme Editor link.
- Select the file called Header or header.php to edit the file.
- Add the following code below the HTML tag.
<link rel="shortcut icon" href="<?php echo get_stylesheet_directory_uri(); ?>/favicon.ico" />
Q6. How to add Google Analytic in the website?
In the Customize page we have separate section to add Google Analytic. Please navigate to Customize link in Appearance menu and add your Google Analytic code in the available text box.
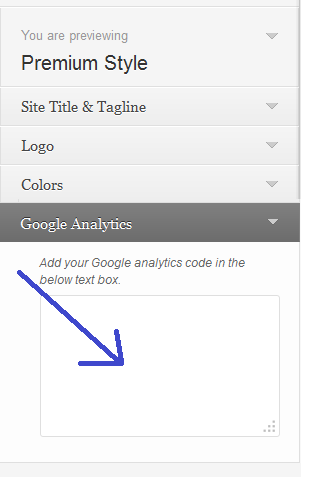
Go to Administration Panel ==> Appearance menu ==> Customize ==> Google Analytic
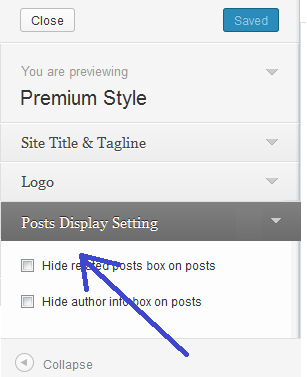
Q7. How to enable and disable Author Info Box in the post?
In the Customize page we have separate section to enable and disable Author Info box. Please navigate to Customize link in Appearance menu to update the option.
Q8. How to enable and disable Related Posts Box in the post?
In the Theme Customize page we have separate section to enable and disable Related Posts Box. Please navigate to Theme Customize link in Appearance menu to update the option.
Go to Administration Panel ==> Appearance menu ==> Customize ==> Display Box Setting
Q9. How to use redirect template or how to redirect page in this theme?
- Create a new page in your WordPress Dashboard.
- Add a title to your page.
- Add an URL in the content of the page (e.g. http://www.gopiplus.com OR www.gopiplus.com)
- Select “Redirect” as the page template in the Page Attributes.
- Click Publish button
Live demo
Theme features
http://www.gopiplus.com/work/2013/11/11/premium-style-wordpress-theme/
Download link
http://www.gopiplus.com/work/2013/11/12/premium-style-wordpress-theme-documentation-download-link/